

JWT Authentication with Django REST Framework— The easy way
Learn how to use JWT Authentication with Django REST API.


What is Django ?
Django is a popular Python based web framework. It is a high level opinionated framework that allows developers to write clean, pragmatic and maintable code with minimal effort. It is fast, secure and scalable. It is because of these reasons that it is used by some of the most popular brands in the industry such Instagram, Pinterest, Spotify , Youtube etc.
User authentication is one of the key features that is required for any backend framework and Django is no exception. Django REST framework provides several mechanisms to handle user authentication out of the box which can be found here.
What are JWTs ?
We are going to explore how to use a third party package i.e. JWT (JSON Web Tokens) in our Django REST Application for Authentication purposes.
JSON Web Tokens are an extremely popular authentication mechanism used widely throughout the industry due to its sheer simplicity and negligible overhead. JWTs are three Base64-URL strings separated by dots. They are generated with an encoded header, the encoded payload (username & password) ,a secret key and ofcourse an encryption algorithm (that is specified in the encoded header).
You give an username and a password to the server it returns an Access Token and a Refresh Token in response. Access Tokens are sent with the API requests under Authorization header as Bearer tokens. They usually last about 5 minutes but the duration may be changed in the settings. When the access token expires we use the refresh token to get a fresh access token. Refresh Tokens generally last 24 hours.
Getting Started
For this tutorial, we will be using a third party package — djangorestframework-simplejwt. This package is recommended by Django Rest Framework documentation as well.
Open your project directory and activate your virtual environment. Once inside, install this package in your project.
pip install djangorestframework-simplejwt
After installing go to your settings.py file inside the root application of your project and add this snippet.
REST_FRAMEWORK = {
    'DEFAULT_AUTHENTICATION_CLASSES': (
        'rest_framework_simplejwt.authentication.JWTAuthentication',
    )
}
Your configuration is set up and your project can now use the JWT Authentication. Simply set up two routes — one to fetch token pairs (access and refresh tokens) and another to fetch new access tokens using refresh tokens. To do this go your urls.py and set up these routes.
from rest_framework_simplejwt.views import (
    TokenObtainPairView,
    TokenRefreshView,
)

urlpatterns = [
    ...
    path('api/token/', TokenObtainPairView.as_view(), name='token_obtain_pair'),
    path('api/token/refresh/', TokenRefreshView.as_view(), name='token_refresh'),
    ...
]
You can also include a route for Simple JWT’s TokenVerifyView if you wish to allow API users to verify HMAC-signed tokens without having access to your signing key:
urlpatterns = [
    ...
    path('api/token/verify/', TokenVerifyView.as_view(), name='token_verify'),
    ...
]
Viola ! Our JWT Authentication is set up and we are good to go. We can add some additional configuration as well. We will get to that later. But now let us check if our routes are working properly through a simple test.
Example
Create a sample route to test our Authentication mechanism.
from rest_framework.permissions import IsAuthenticated
from rest_framework.response import Response
from rest_framework.views import APIView

class HelloView(APIView):
    permission_classes = [IsAuthenticated,]

    def get(self, request):
        msg = 'Hello ' + request.user.first_name + ' ' + request.user.last_name
        return Response({'msg': msg})
In the above snippet, we create a route — HelloView. We declare it as a protected route i.e. only authenticated users can access it.
Let us add this view to our urls.py as well.
from django.urls import path

from api import views

urlpatterns = [
    path('hello/', views.HelloView.as_view(), name='hello'),
    ...
]
For testing purposes, I already went ahead and created a user through the Django Admin portal with the following credentials. You may use your own credentials.
{
    "username": "spiderman",
    "password": "underoos",
    "first_name": "Peter",
    "last_name": "Parker"
}
Now to test our API, we will use Postman.
- Let us obtain the token pairs.
Create a POST request to /api/token/ route with username and password credentials.
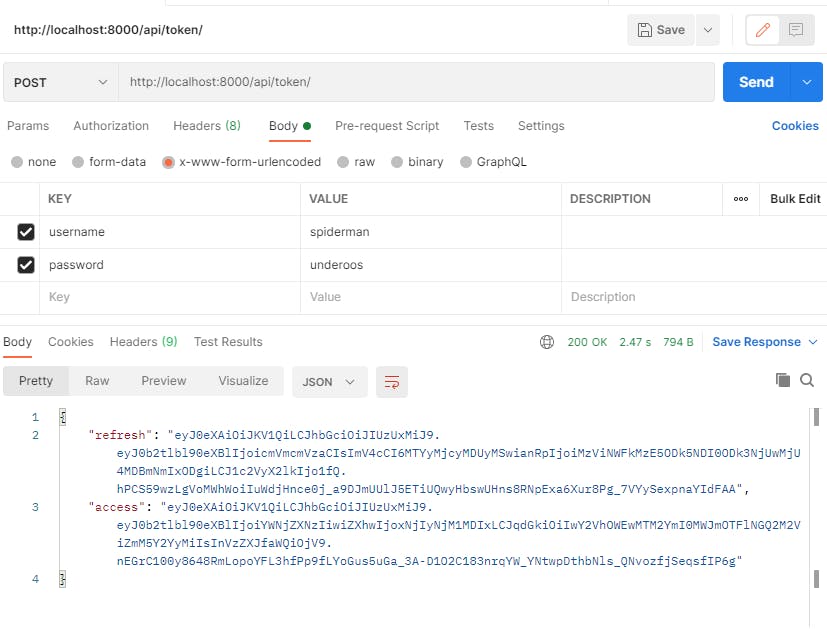
We successfully obtain our access token and refresh token.
2. Check whether our HelloView route is protected.
Copy the access token. Create a new GET request to the route /api/hello/ . Go the Authorization section and select the Type as Bearer Token. Paste your access token inside the Token input box. Now send the request.
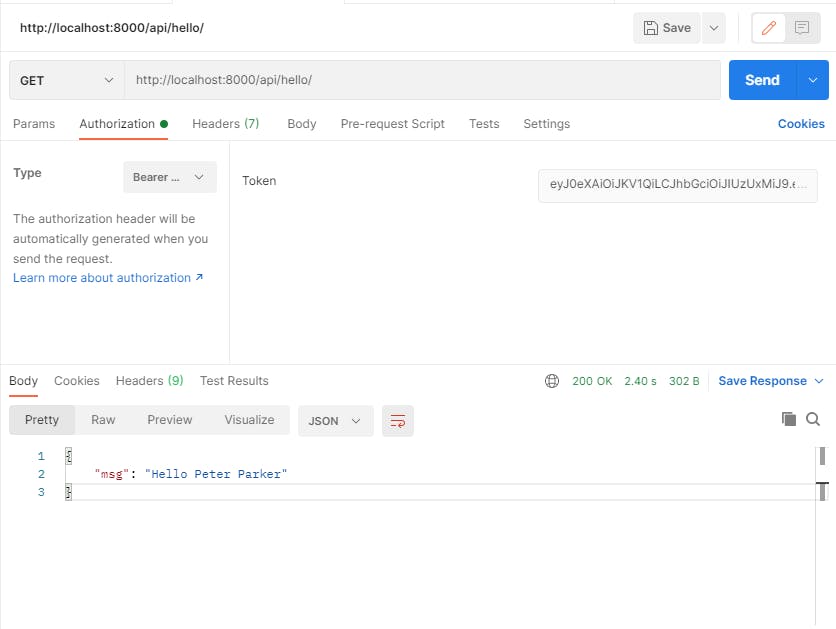
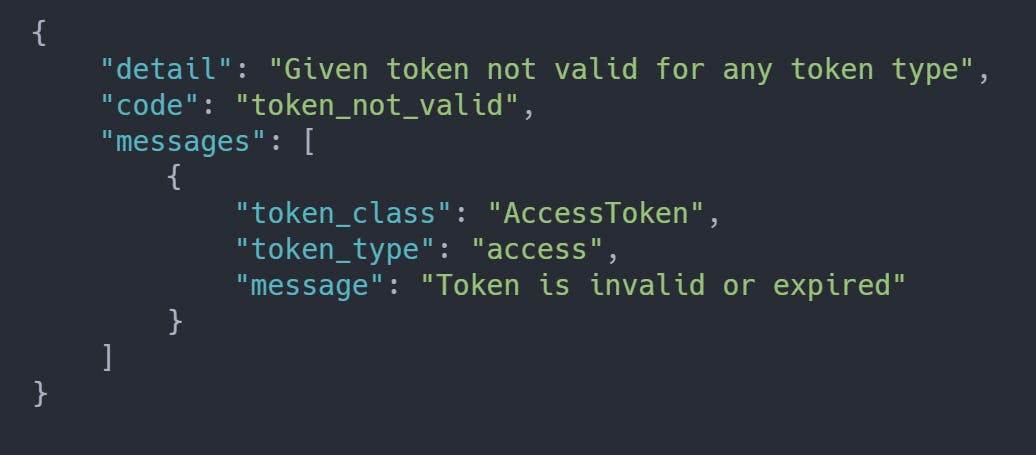
Our route returns a successful response with Status 200. If we were to change even a single character in our access token and then send the request, we would a response like this.
3. Using Refresh Token
After a period of 5 minutes, our access token will expire and will no longer be valid for API requests. If used, it will return us the above response. At this point, we must send a POST request to /api/token/refresh/ route to obtain a new access token using our refresh token.
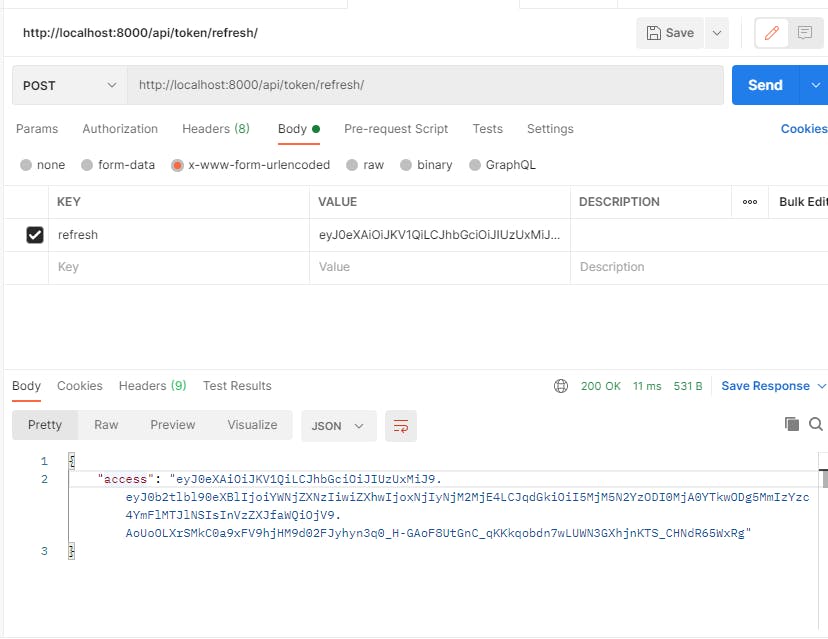
See ? So simple. Our JWT authentication mechanism is integrated into our Django REST API and is working flawlessly.
Configuration
If you wish to extend your access token lifetime, refresh token lifetime, change the encryption algorithm or the secret key, you can do that by adding a new dictionary to settings.py name SIMPLE_JWT.
Say if we wish to change the SIGNING_KEY for our encoding, the encoding algorithm and extend the duration of access token. We can configure it as follows.
from datetime import timedelta

SIMPLE_JWT = {
    'ACCESS_TOKEN_LIFETIME': timedelta(minutes=15),
    'ALGORITHM': 'HS512',
    'SIGNING_KEY': 'secret123'
}
Note : I highly recommend not exposing your SIGNING_KEY in your code like this. Instead use environment variables.
There are several other properties that you can manipulate as well. Refer to the full documentation here for the details.
Conclusion
With this we have finally completed our tutorial for implementing JWT Authentication in our Django REST App.
Hope you found this useful and learnt something new.
Happy Coding.